Sunday, July 31, 2011

A Labor of Love

I am working away on Mason's scrapbook but tonight I just got this one page done.  I spent 3 or 4 hours on it but it was a labor of love.  I was scrapping some of my favorite pictures of him.  Jen loved this little out fit and he wore it a lot.  I would call him Racky Racoon when he would wear it and the little shirt says on it, "It wasn't me."  He looks cute as can be in it.  I am sure you will agree!  I am betting that Jen will frame this one and put it in his room, as the colors match his room so well, and it will also be nice to have it out on display for his party.

Last week, I downloaded a whole bunch of scrapbook sketches and this is the sketch that I chose to follow for this layout.  Isn't this picture just a stitch where it looks like he is winking?!?!?  LOL  Absolutely adorable and so perfect with that shirt!

I used a pink scalloped circle of  SU paper as a template to draw my scalloped circle and then I cut it out.  I traced a dinner plate to make the celery circle.  The bracket was cut out with the Cricut cartridge Plantin' School book.  I used a Chocolate Chip marker to do the hand stitching.  The letters were cut out with the Big Shot and the Naturally Serif die.  One of my favorites.  They are a nice small size and I reach for that die a lot!

The center circle was punched with the 1 3/4" Circle punch, and the heart was punched out using the Heart to heart punch.

I am so very thankful to have air conditioning.  This heat is something else!  I plan on holing up in the Stamping Cave all week until the flea market next Saturday.  I do have a few errands to run, and I will venture out to the mail box as I have a few goodies arriving in the mail this week, but other than that....home is where I plan to be!  :-D

I plan on putting in a stamping order, and a Tastefully Simple order, so if you need some things, send me an email or give me a buzz! 


Lots of fun things in the new catalog!  And wait till you see the Holiday mini.....you are going to love it!!!

Stay cool!  Elaine


Friday, July 29, 2011

Does any one have....????

Hello-  If anyone has any extra plastic containers with lids that sandwich meat comes in, would you please save them for me?  My mom uses them to sell nails and screws in at the flea market.  The customers love them as they are great for storing them in there workshops.  I am also saving 5 gallon pails, with handles on them like the kind kitty litter comes in.  Mom and Dad use them for different things and now Jenna has asked me to save them for her too.  Thanks in advance for your help!  Elaine

Love My Onesies

I have been working away on Mason's scrapbook today and I quick took a picture of a couple of pages that I just finished.  I have a whole table set up in my stamping room so that I can leave the Cricut set up and to have room to spread out.  That way, if I want to work on a different project on my stamping desk I can. When you scrapbook, you really need to have a large table to work on.  I moved this layout over to my stamping desk to photograph it as I have a light mounted under the hutch of my desk and it works great for taking pictures at night.  So disregard the mess!  LOL

I used the Plantin School book cartridge for the letters and the New Arrival cartridge to cut out the onesies.  I dug in my designer paper scraps drawer and picked out a bunch of papers to cut out onesies with.  I also have a bunch cut in other colors so you will probably be seeing some more pages with them on in the future.  Jenna always has a onesie on Mason, day and night.  It is rare if he doesn't have one on.

 I talked to Jenna and Mason today and Mason kept answering my questions with YEAH.  It is his favorite word to say.  Jen said Mason was so happy to talk to me.  He was all smiles and he was sitting on the floor in his room spinning around in circles!  LOL  I can just see him doing that.  I sure love that little guy!  Elaine

Thursday, July 28, 2011

Sweet Dreams Mason...

I just finished this scrapbook page of Mason for the wood stand in my craft room.  Susie Smith's husband Wayne, makes these and sells them.  I have the 6" x 6" page size, and he also makes a 12" x 12" page size.

Jenna and Mason left last night for home.  They were here from Monday till Wednesday.  The house seems really quiet today with out them, but this Grammie took advantage of that and got a lot of much needed rest!  But never the less, I miss them.  Especially since I spent all last week with them.  Little Mason will hold out his arms for me now.  We have really bonded.  It melts this Grammies heart!
My little sunshine!
I had this page done in about 15 minutes because I had the pendant colored, and cut already.  Remember my dollar digi post!?!?   This is the same little pendant.

This picture is So.. Mason.  He is always in these very relaxed, kind of slouched positions.  And he is such a little cuddler.  I love it.
Here is the recipe:  Digital Image from Stretch N' Bubbles, Stamped images are from Fiskar's Sweet baby Sentiments.

Tuesday, July 26, 2011

Stretch N' Bubbles Dollar Digi Stamp


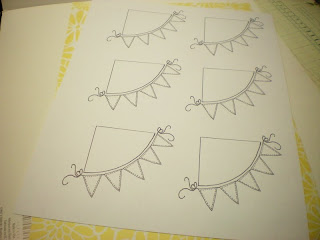
Purchase your digital image and download it to your computer.  If you are new to this, I would suggest downloading it to your desktop so it is easy to find.  Most digital images come in a compressed zip file so you will need to right click on it and extract it.  Then open up Microsoft Word, select insert, picture, from file, desk top, then open the file with your digital image in it, and select (or click on the image) to open it and the image will pop up in Microsoft Word.  I then right click on it to copy, press the enter key so that the cursor goes down a row, and then I clicked on paste.  I repeated this until my sheet is full of images.  For this image, I put 6 on a sheet.  I printed it out twice, once on white card stock, and again on designer paper.  Then I saved this sheet that I had made up in Word to my digital stamp folder on my desktop so that the next time I want to use it, all I have to do  is to open it and print it out   Once you do the work of setting it up on a full sheet the first time, you can use it over and over.  And of course, you don't have to use it with WORD, you can use it with other printing programs too.  I used WORD today as most people have that program.            

Saturday, July 23, 2011

Papertrey Ink Challenge #8

One more card for the Papertrey Ink Challenge #8.  This girlie is beat so this is the last one I am doing.  Time to get the jammies on....that is for sure!
I had my jar all cut, stamped, and colored, so that is what I started out with.  I had made a bunch of jars up one day when Lady Di and I were stamping at her house.  I was sure glad to just grab one and start working!  This challenge was to cut off your card stock an inch or two so that part of the back of the card shows and you can put pattern paper, a strip of glitter, what ever, along the edge.  I have made a lot of cards like this, in fact, the anniversary card for my mom and dad that I showed on a previous post, uses the same technique.  And I have taught it to my stamping groups in the past.  Any who...I decided to scallop the edge and then pierce it, and add pattern paper to the inside edge of the card.  The grass was made with a Martha Stewart punch, and I free hand cut the sun and did some faux stitching with a marker.  The verses are from PTI Garden of Life and the Jar is from PTI Friendship Jar.  The flower/fence inside the jar is from Friendship Jar Spring Fillers. 
Enjoy the rest of the weekend!  Elaine

Papertrey Ink Challenge

 Good Evening!  I hadn't planned on doing two posts tonight but when I was reading my blogs that I subscribe to on Google Reader (over 450 of them!), I saw that Papertrey Ink had 9 challenges going on today and I decided that I would quick "play" before the contest ends at midnight Eastern time.  I chose to do Challenge 7 and that was to take two or three stamp sets and layer them in them in a surprising way.  I chose to use Papertrey Ink Tea for Two and Floral Frenzy stamp sets.  I first stamped the tea pots and then used the half daisies like doilies.  One for under the teapot and one on the teapot as a doily around the pot (kind of like a ruffle on a mason jar.  I then took a flower center from Floral Frenzy and stamped dots to finish out the background, and added the sentiment from Tea for Two....Special Friend Blend.  Wish me luck....I could win a stamp set if my card is randomly drawn!  Elaine

You can go to Nichole Heady's blog if you would like to see the challenges!
http://nicholeheady.typepad.com/

Happy Anniversary Mom and Dad!

Today is my Mom and Dad's 51st anniversary and this is the card that I made to give them.  This DSP is just gorgeous.  I love the glitter in the flower centers.  I made this card so fast.  It is funny how some cards are that way, your designing process just works, and it works quickly.  This was a simply card to make.  But it was fun to play with all those embellishments that we tend to hoard.  I had some leaves in one of my die cut/punch drawers that I had cut out with the SU Birds and Blooms Die.  It is nice to have those things done a head of time and you can just quickly grab them.  I took a foam pad and a stylus and made "veins" on the leaves if you look closely, you can see them.  The border on the bottom was punched with a Martha Stewart Punch, and the Happy Anniversary was stamped with  SU Teeny Tiny Wishes (one of my most used stamp sets) and it was cut out with a Spellbinders Nestabilities Double Ended Tags Die.  The flowers are from Michael's and the Rhinestone brad is from SU.  Happy Anniversary Mom and Dad!  Wishing you many more!  Love, Elaine

Friday, July 22, 2011

Crock pot Barbecue Chicken

Hello!  I am back home from a busy week in Milwaukee!  Little Mason is growing up so fast.  He is loosing the baby look a little bit and is beginning to look more like a toddler!  He is into EVERYTHING, so you have to watch him constantly.  He is crawling all over the place, and walks around furniture.  He just turned 11 months and I am sure he will be walking before his first birthday.  He kept Grammie, (and everyone else!) very busy!  Jenna also had me working on other projects.  I worked on designing pages for Mason's scrapbook, made him a birthday banner, four birthday cards that she needed for birthday parties they are attending, and I have 25 of these Elmo tags in process.  My Cricut got a real work out!  These will be attached to treat bags for the kids attending the party.

I also watched Mason one afternoon so Jenna and Diana could go shopping for some birthday gifts, another evening so they could go to the library, stayed up with Mason one whole night as he was running a temp and teething, so he slept in my arms on the couch (Grammie slept some too!), and then watched him last night so Antonio and Jenna could have a date night.  Plus lots of watching in between so Jenna could get a nap or get some cleaning done.  So to say the least, it was a busy week!

Here is a recipe I saw on Money Saving Mom's blog, and I made it tonight and it was very good.  I couldn't find my red pepper flakes so I omitted that.  If I make it again, I will make the whole bag of chicken breasts from Aldi's which has 12 in it as there is a lot of sauce with this recipe and I think it would work fine with 12 breasts.  The Sweet Baby Ray's BBQ sauce at Aldi's has 50% more free in it.  I am not sure if this is the correct amount of sauce to use, but that is what I used and it tasted delicious.  I also think this recipe would be good to make pulled chicken sandwiches with.  Just shred the chicken up and mix it into the sauce.  If you try this recipe out, let me know what you think of it.  A good thing to make in this heat!!!

Crock pot Barbecue Chicken

4-6 pieces boneless skinless chicken breasts (i threw them in frozen... even easier!)
1 bottle BBQ sauce (sweet baby ray's all the way!)
1/4 c vinegar
1 tsp. red pepper flakes
1/4 c brown sugar
1/2 - 1 tsp. garlic powder
Mix BBQ sauce with all ingredients listed under it. Place chicken in crockpot. Pour sauce over it and cook on LOW for 4-6 hours.

Wednesday, July 20, 2011

Just Go Sporty

Hooded Sweatshirt is from Gina K's Just Go Sporty Stamp Set.
Verse inside is from SU It's Your Birthday.
One things I absolutely love about cooler weather is to be able to wear hoodies!  I just love them and would wear them, year round, every day of the week if I could!  I bought this stamp set several years ago when we made a trip to Gina K's retail store.  That is now closed and she only sells online.  It was love at first site when I saw this stamp set!  Another masculine card for the card rack.  The great thing is that this stamp set can be used for either males or females, depending what color card stock (or pattern paper) that you stamp the hoodie on.

Recipe:  Card Base Old Olive
Next layer is 4" x 5 1/4" Chocolate Chip
  Next layer is 3 3/4" x 5" DSP
  Next layer is a 2 5/8" x 5" Mat for
  Next layer of 2 1/2" x 5" DSP
  Stars are punched out of Chocolate Chip Card Stock with the SU Small Star Punch
  Happy Birthday is from SU It's Your Birthday and is stamped with Chocolate Chip Ink

Tuesday, July 19, 2011

Bob's Graduation Party

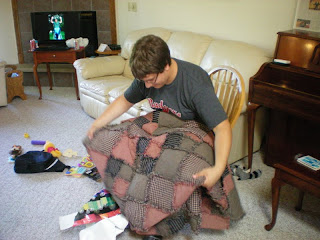
Bobby with the rag quilt I made him.
A group picture when we first got their with his "cookie" cake!

Pepper watches Bobby open his card.  Bob read's the card and smiles.  Say's he LOVES homemade cards.

The unwrapping of the quilt.

Sunday, July 17, 2011

Noble Deer

 One thing I need to make more of is masculine cards.  So I made 6 of these.  I really like these colors together.  Here's the recipe:

SU Noble Deer and PTI Friendship Jars (greeting)
Card Base Sahara Sand
Next layer 4" x 5 1/4" Chocolate Chip
Next layer 3 3/4" x 5" DSP
1" x 5" Certainly Celery (with trees stamped on it.)
1 1/4" x 5" Mat of Chocolate Chip
3" x 3" Sahara Sand (Deer stamped on this)
3 1/8" x 3 1/8" Mat of Certainly Celery Card Stock
3 1/4" x 3 1/4" Mat of Chocolate Chip
1 1/4" Circle Punch (it's you Day stamped with Chocolate Chip In on Whisper White Card Stock)
1 3/8" Circle Punch Mat of Chocolate Chip Card Stock

Saturday, July 16, 2011

For I know the plans I have for you...

 Good Evening.  I am buzzin' around right now getting things done because I had a 3 hour nap after I got home today!  The heat sure zaps a person out...at least it does me!

This is a card I finished last night.  I have 4 more of them ready to put together, but I ran out of steam to finish them last night.  This is a 2 piece stamp set from Verve and the name of it is Jeremiah 29:11.  It has the verse and the cross in this small set. You can see it here http://shopverve.com/vs-09-002.html  I bought a used Papertrey Ink stamp set this week from a gal on line and when I saw that she had this set for only a $1.00, I had her add this on to my bill.  I have some other Verve Plain Jane stamps with Bible verses and I like them a lot.  If you look under the tags on the side bar under Contraband or 3 D, you will find some other projects that I have made with them.  This verse has special meaning to me as this is the verse that Jenna chose as her confirmation verse, when she was confirmed.
Stay cool!  Elaine

Here is today's recipe:

Stamp set: Verve Jeremiah 29 :11
Ink: Memento Black and SU Bashful Blue
Card Stock: Black, White, Kraft, Pink Passion, Lavender Lace
Ribbon: 6 1/2" SU Black Grosgrain
Cuttlebug Embossing folder: Floral Fantasy
SU Embosslit: Beautiful Wings
Punches: SU 3 /16" Corner Punch, Spiral Border
SU Jewels Basic Rhinestones

Card Base: 4 1/4" x 11" Black (side fold)
Layer 1: White 4" x 5 3/8"
Layer 2: 3 3/8" x 4 5/8" Black
Layer 3: 3 1/4" x 4 1/2" Pink Passion
Layer 4: 2 3/4" x 2 7/8" Kraft
Layer 5: 2 1/8" x 2 5/8" Black
Layer 6: 2" x 2 1/2" White

Friday, July 15, 2011

Here comes the weekend...and the heat wave!

Hello!  It is gloomy and it is trying to rain here in Mayberry.  I made 6 of these cards today before Di and I decided to head up to the Rapids this afternoon.  We had received the Lighthouse flyer last week and there were some stamps on the flyer that were calling Di's name!  We had Chinese first at Hong Kong buffet, then headed over to Walmart.  I picked up a few groceries while Di was picking out a carpet cleaner.  After that we headed over to the Lighthouse Books and stamp store, and we each picked up some new things.  Maybe if I am ambitious, I will ink some of them up later.  I got an adorable button jar rubber stamp, a rubber stamp of a sick mouse that is wrapped up in a quilt with a cup of soup in front of him and a tissue box beside him, and a little monkey stamp set.  They are all adorable.  They have some really cute stuff.

Speaking of cute....Mason has really been melting this Grammies heart.  The last few days when I talk to him on the phone, he immediately recognizes my voice, and his voice changes.  As soon as he hears my voice, his voice changes into this happy sing songy babble.  It is just adorable, and I absolutely love it.  I usually have tears running down my face while I am talking to him, he sounds so happy to hear my voice! 

Have a great weekend and stop down and see me at the flea market if you have a chance!  Hugs!  Elaine

Recipe:
Stamp Sets:  SU:  The Open Sea and Teeny Tiny Wishes
Card Stock:  SU:  Sahara Sand, Chocolate Chip, Night of Navy, Real Red, Very Vanilla.
Ink:  SU:  Early Expresso, Soft Suede, Night of Navy, Marina Mist.
Ribbon:  SU:  1 1/4" Riding Hood Red
Punches: SU:  1 1/4" and 1 3/8" Circle, and Word Window.

Thursday, July 14, 2011

My Pink Stamper 2011 2 Design Team Call

My entry for the design team challenge!

Cricut Create Machine cutting the card base.

Cut 2 pieces 4 1/4" for the Card Base.  I chose this size so it will fit in a standard size envelope.

Score back panel of Card Base at 1" across the top.  Put adhesive on the top portion and attach Card Front as shown below.

Front and back pieces of card stock adhered together with card front flipped up.  Number one candle cut with Cricut to decorate the inside of the card.

I added little knots on each pendant.  It is REALLY strung with Baker's Twine and it dangles.  It is the little details that make a project special!

I love Pendants!  I used this same cartridge on the Pendant Banner I made on the "Family" frame last weekend.  I love that with a Cricut you can change the size and make things big or small, whatever size you need!  A great value for your money!!!


Hello readers!  Today is a special post.  I am entering a contest to be considered on the My Pink Stamper Design Team.  My Pink Stamper is a very popular blog that features Cricut cartridges.  Robyn does lots of video's that show how to make cards and other projects with Cricut cartridges.  She does lots of "giveaways" of Cricut cartridges and other things. If you are a Cricut owner, this blog is a must read.  It will really help you to learn how to use your machine to it's maximum potential.   Robyn recently developed a stamp line of her own called My Pink Stamper with lots of sayings that go great with images from Cricut Cartridges.  If select to be on the design team, it will be a 6 month term from August to January.  You must have a blog that you post on regularly and that you have been posting on for at least 3 months.  You can submit and link a project that you make using your favorite Cricut cartridge, and you must use the following colors: Green, Brown, Orange, and Turquoise, plus one other color which is optional.  I chose to use the Cricut Cartridge Celebrations.  Everything on this card, and the card itself, was cut with the Cricut except for the dotted pattern paper.  That I cut with a paper cutter.  You can see by this card that it is a very versatile cartridge, as it cut a large scalloped square, pendants to make the banner with, the candy that is on the pendants, circles, a dog, and a party hat.  There are many more images on this cartridge.  I used this same cartridge on my Elmo card a few day's ago and made the pendants on my "Family" frame with it last weekend..  I am sure that there will be a lot of people applying for this design team position.  It would be a big honor to get chosen!  Wish me luck!  Elaine

Recipe:
Cricut Cartridge Celebrations
Card Stock and DSP all Stampin' Up!:  Wild Wasabi, Tangerine Tango, Chocolate Chip, Soft Suede, Tempting Turquoise.
Bakers Twine Stampin' UP! Cherry Cobbler.
Needle.
Paper Trey Ink Mixed Messages stamp set, used the words "Celebrate Today".

Wednesday, July 13, 2011

Good find at Practical Cents


I found this necklace and earring set at Practical Cents today for $5.00!!  Woot Woot!  It looks like something you would find at Kohl's.  I tried to take a picture for you to see it but it was kind of hard to photograph at this time of the day.  I also found 3 skeins of yarn.  I had to go to Pamida for my prescriptions today so thought I would check out Practical Cents while I was uptown. 

It sure is a beautiful day today.  I love this temperature!  I hope it lasts through the weekend.  Elaine

Stamping Blogs

I was looking through the blogs that I subscribe to and this gal had a link to a list she had made up of stamping blogs.  I was looking at the list, and all of a sudden, I could not believe my eyes, but she had my blog listed on it.  I clicked on the link, and sure enough, it was my blog!  Many thanks Nuttnhoney!!!  Any who....I thought I would share the link to her list.  Enjoy!  Elaine

http://www.nuttnhoney.net/StampingBlogs.htm

New rubbah....Vintage Vogue

 This is the best time of the year for trading as a lot of demonstrator's dump their retired stamp sets to make room (and to make cash) for new one's.  I don't get rid of many of my retired sets as I make cards to sell.  I was fortunate to make a trade for this retired set last week called Vintage Vogue.  I love the shabby chic look of this stamp set.

I started out by stamping the flowers in Riding Hood Red and Tempting Turquoise ink, and cutting them out.  They have a brad holding them together in the center.  Then I stamped the F and cut those out, stamped "friends" with a Tempting Turquoise marker on 2" white circles, that are matted with 2 1/4" circles.  Then I stamped the flourish with "stamped off" Tempting Turquoise Ink.  I headed over to the computer and printed out a sheet of Tempting Turquoise small polka dot paper.  I just love being able to do that, to have all the colors of dsp at my finger tips.  Now you are probably thinking that it costs a lot to do this.  Not really.  I have a HP printer with separate colors so you just replace which color runs out.  I buy all my ink at inkgrabbers.com.  It is very inexpensive, they run coupons, and specials each month, and I have not found anyone that can beat their price on ink.  Check it out.  You may also want to check out the DSP that is available at the Stampin' UP!  website.  I believe there is 43 or 45 different colors in the small polka dot pack for $4.95.  And their is no shipping charge, and you can immediately download it on to your computer after you purchase it.  You will need to select a demonstrator, I would suggest Elaine M. Wilson....lol.  You can always change it later on if I am no longer a demonstrator.  I also purchased the stripes, and the script as these are basic prints that I know I will use over and over again.  Another tip I have for you is to print it on SU Whisper White card stock.  I have tried to print it on Georgia Pacific's before and it turned out ok, but not the true color, which you want it to be if you are matching something else on your project.  You can use what ever program on your computer that you normally do printing with, just go in under Properties and make sure Best quality printing is on, and that you choose a paper size of 8 1/2" x 11" borderless printing.  That should be all the changes you will need to make in there.  I also used the Perfect Petals Embossing folder to emboss the back ground of the card.  That is another thing that could lead to a problem.  Sometimes the embossing folders "shrink" the card front after you have embossed them.  This makes the card front shorter than the back of the card or kind of wonky.  To fix this, just put your folded card into your paper cutter, I use my guillotine, and cut it just a little bit on each end, for a perfect card!

For those of you who do not like to make cards, I have 6 of these of available and the price is $2.50 each.  Inside the saying says: Good friends are like stars... you don't always see them, but you KNOW they're always there.  Have a wonderful day!  Elaine

Tuesday, July 12, 2011

Family Scrapbook Frame


I worked on the Scrapbook Frame this weekend.  It took about 6 hours to complete.  I have it hanging in my living room now.  Elaine

Monday, July 11, 2011

Sweet Days of Summer

 Enjoy the moment.  That about sums things up.  Life changes too fast not to stay in the present.  Not the past, not the present, just here in the right now, "the moment".  Enjoy it.  Some would say I fiddled, diddled around way too long on this card, but I was enjoying the journey, the moment.  That is why a true crafter crafts, the pleasure of it all, and I enjoyed every moment of it all.

Recognize the seam binding!?!?!  This was one of my treasures from Practical Cents a few weeks ago.  I love it on this card.  Nice and lacey, it adds a lot of texture to the card with out a lot of bulk.